|
IoT (Internet Of Things) |
||
|
Development Tools
On this page, I will introduce you several developmenet tools for IoT hardware module. Most of the tools here is mostly for prototyping IoT devices. You may use the software you developed at this protototyping, but it is not likely that you will use these prototyping solution as it is as your final product. Howevever, the solutions introduced here are very convinient, easy to use and you can build most of the solutions without much knowledge of electronics or RF or protocols. With these boards and a lot of sensor / actuator modules in the market which are compatible to these boards, you can build various things just like building things with Lego blocks and very simple programs. I found a series of Introductory Lectures covering almost every components that is required to implement a IoT system and put the list in reference section (Ref [1] ~ [6]).
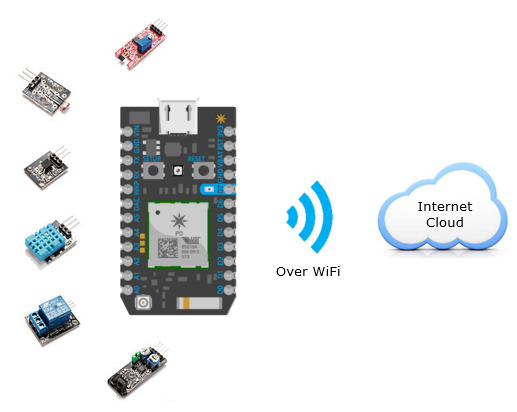
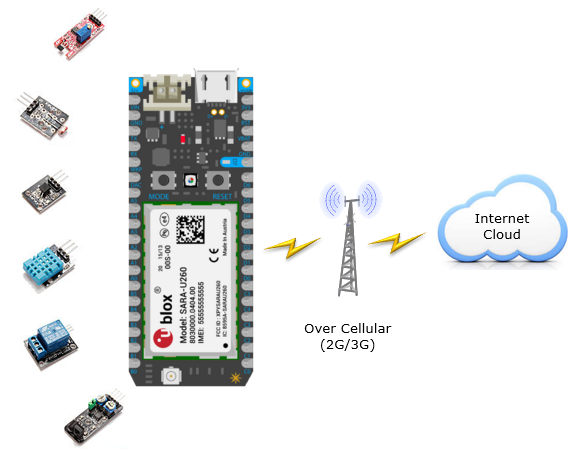
Followings are some (probably most) of the prototyping boards that can be used for IoT application.
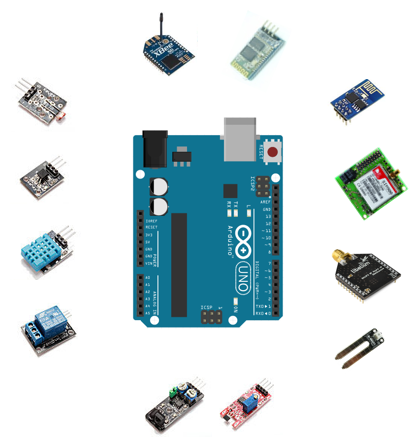
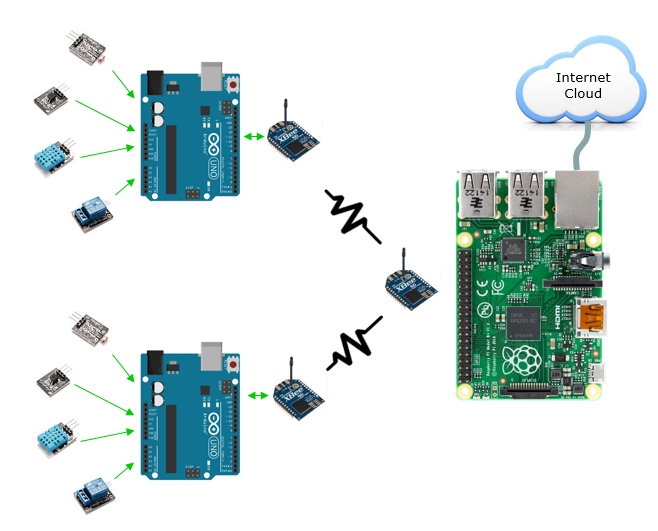
Arduino is not originally designed for IoT because it has been there since long before we had the term 'IoT' (You can find some story of Arudio / history from https://en.wikipedia.org/wiki/Arduino ). Anyway, Arduino has become so successful and so widespread among those who are interested a small scale embedded system/microcontrollers. Now a huge community were formed and a lot of materials, tutorials, video and tips and most importantly lots, lots of sensors and acutuators compatible with this board. It became a kind of standard tool in microcontroller / embedded system community and most of other development / prototyping boards comes out with interface with Arduino board. Most of other boards that are introduced in this page provide interface for Arduino boards. So if you are relatively new to the world of microcontroller / embedded system, I strongly recommend you to start with Arduino first. The most appealing thing to me about Arduino was 'very low cost (less than 30 USD)' and very simple programming. Also sensors / actuators for this board are very easily available and at a very low cost.
Followings are some of tips and tutorials that I created from my personal experience and some videos from YouTube (YouTube videos are not mine).
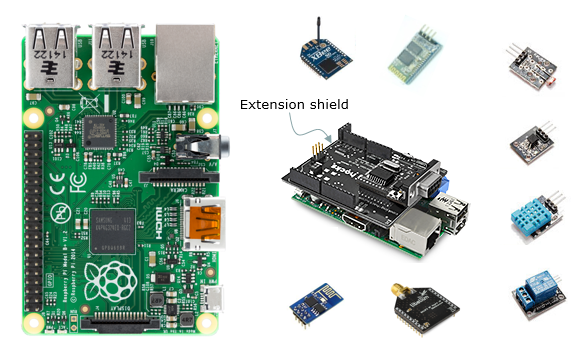
Raspberry Pi is basically a fully functioning PC at super low cost. The mother board part of the PC is almost as cheap as Arduino board. It is only about 35 USD, but you would need to add some additional cost to use it as a PC. For example, you need to buy a memory card to install the operating system, monitor, mouse, keyboard. It can run on several different type of operating system.. I think most of users run this on Linux and recently you can run it on Windows 10. It has built in Ethernet port and now on Raspberry Pi 3, it provide built-in WiFi and Bluetooth. It means you can use this almost the same as you use your Laptop PC. In addition, it has many IO pins (called GPIO - General Purpose Input Output) to which you can hook up various sensor and actuators. It means that you can do similar things as you do with Arduino. If your application requires more sophisticated software implementation in addition to controling sensors / actuators, Raspberry Pi might be a better solution.
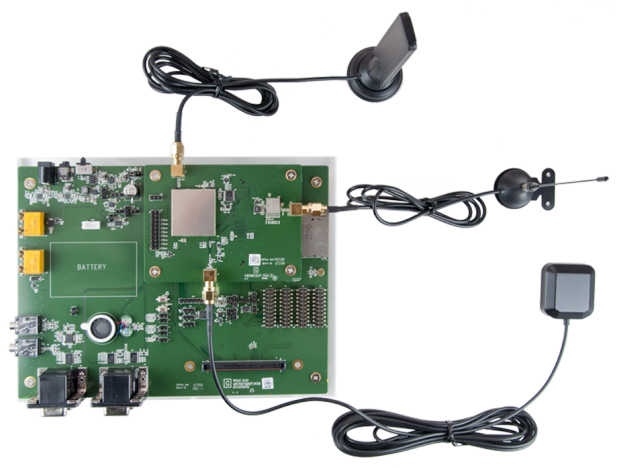
Qualcomm IoE Development Platform
Reference :
[1] Lecture 1: Introduction to the Internet of Things (YouTube) [2] Lecture 2: Electronics for the Internet of Things (YouTube) [3] Lecture 3: Software for the Internet of Things (YouTube) [4] Lecture 4: Sensors and peripherals (YouTube) [5] Lecture 5: Wyliodrin Dashboard (YouTube) [6] Lecture 6: Web servers for the Internet of Things (YouTube) [7] Comparison of the Arduino, Raspberry Pi 2, and Beaglebone Black Rev. 3 (YouTube) [8] Beaglebone Black LESSON 1: Understanding Beaglebone Black Pinout (YouTube) [9] Beaglebone Black LESSON 2: Getting Started (YouTube)
|
||