|
Embedded System - Beaglebone |
||
|
First Connection
Connecting Beaglebone to your PC requires a couple of steps but it is relatively simple procedure and went through without any problems for me. What I especially like about this connection is that I can connect the board running on Linux to my Windows PC. It means I don't need any extra monitor, mouse, keyboard as in Raspberry Pi. As you may know, extra monitor / keyboard / mouse would cost much more than the board itself.
Now let's get through the steps to get the board connected to the PC (in my base, I am using a Windows 7 PC). I purchased a Beaglebone Green in Jul 2016 for your reference. Since the OS version / firmware versions may changes, you may see a little bit of variations on these connection procedure.. but overall flow would not drastically change. Basically this procedure is based on the procedure explained in http://beagleboard.org/getting-started , but I would put some of my personal comments and additional screenshots. You don't have to do this everytime you connect the board to your PC. You need to do this only once when you first connect the board.
NOTE : For Windows 10 Users. The instructions on this page is based on the setting on my Windows 7 PC, but if you try to use Windows 10 PC, you would have completely different experience at the very first step. Beaglebone driver itself is not certified for Windows 10 and Windows 10 does not allow it to be installed and giving you a popup with Device Installation Failure message. I've tried various tips from internet but most of those tips didn't work for me. Eventually I found one that worked for me : How to Disable Driver Signature Verification on 64-Bit Windows 8 or 10 (So That You Can Install Unsigned Drivers). But I want to point out ONE IMPORTANT THING. In this article, there are two options. The first option didn't work for me (try the first option and see if it works for you). The second option worked for me, but it requires Windows BitLocker Recovery key for your PC. If you don't have the key for your PC, don't try the second option. In my case, I didn't have the key when I tried it on Friday evening since my PC were setup by company IT and couldn't reach IT over the weekend. So I wasn't able to use my PC during the weekend. Once again, be sure to have Windows BitLocker Recovery key for your PC before you start the second option in the article.
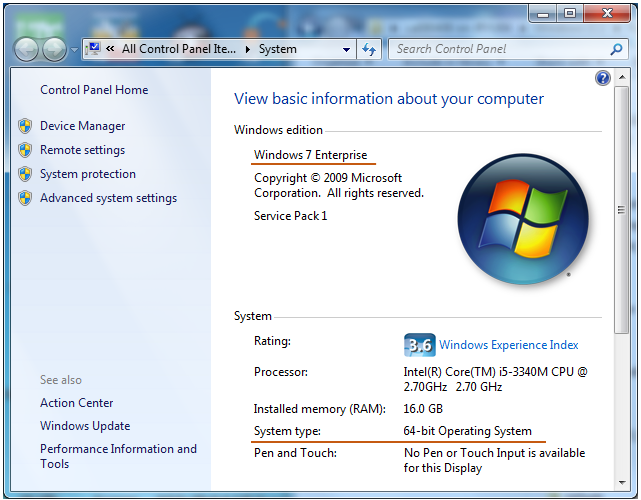
Step 0 : Check your PC Configuration
When you try to follow instructions and tutorials from various web pages, you would notice that the authors would not provide detailed information on the system configuration that they are using. Largely because of this, sometimes those tutorial would work and sometimes it would not.
Before I start my tutorial on this page, I want to give you a snapshot on my PC. If you you different configuration (especially different operating system), you have to change a little bit of the details on this tutorial (e.g, you need to install different drivers at step 2 according to the operating system that you are using).
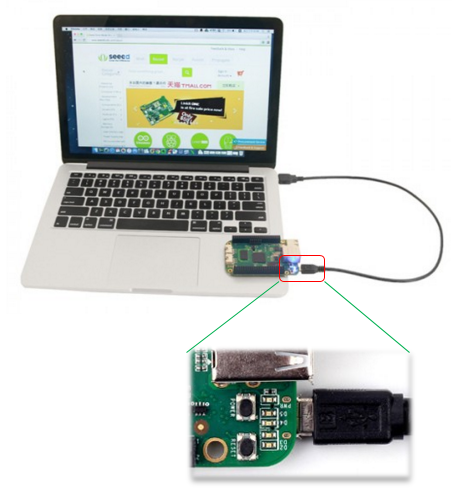
Step 1 : Connect the board to PC via USB
First connect USB cable as shown below. It is not necessary to connect the ethernet (LAN) cable.
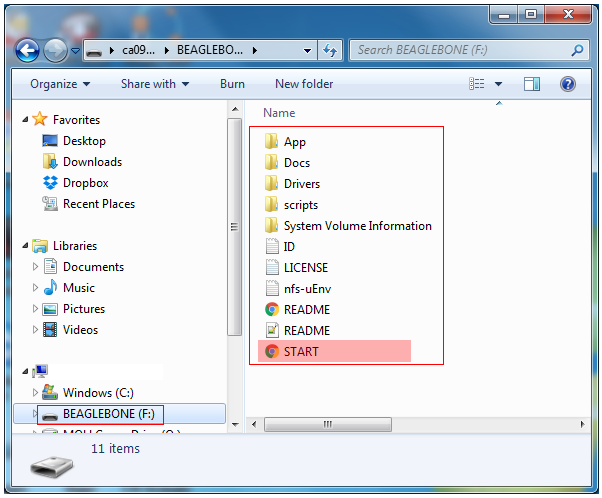
Then you would see the board detected as a external drive (like USB memory stick) as shown below. It would take a few tens of second after you plug in the cable. So don't worry if you don't see this drive as fast as you do when you plug in other USB memory stick.
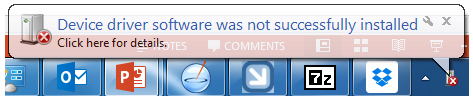
You MAY see following warning message showing up, but don't worry about this at this moment. As long as you see the external driver is detected as shown above, you are OK.
Step 2 : Install USB Driver
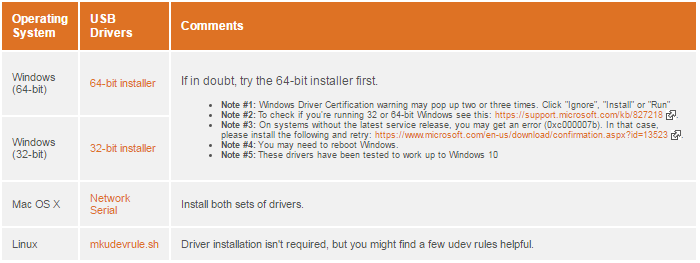
Now you need to a set of drivers by which you can get access to the operating system (Linux by default) on the board over USB cable. You can get the driver at the step 2 section of https://beagleboard.org/getting-started (or you can get the same html page by opening START.html from Beaglebone driver shown above. (I used the one https://beagleboard.org/getting-started, but it would be better to use START.html because the driver in the driver should be the one that has been tested with the specific board you purchased). If you go to Setp 2 section of the page, you would see different drivers for different operating system. In my case, I picked "64-bit installer" for my PC.
Once you download the driver and start installing, you will get a window as follows. Press [Next] button on this window.
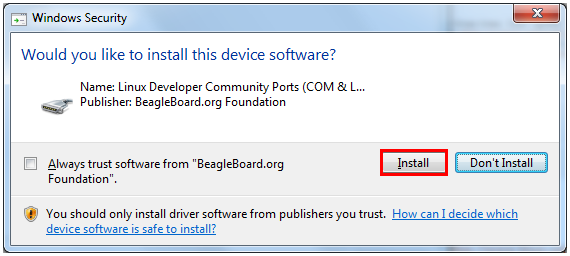
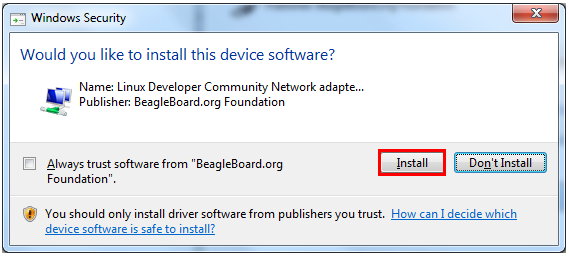
Then you would have following popup window. This is to install COM port driver for the Beaglebone board.
If you press [Install] button, it will start installing the COM port driver. Once this installation is done, you will have another window as follows. Be careful, do not press [Don't Install]. This is not the same driver you installed before. You need to install this as well.
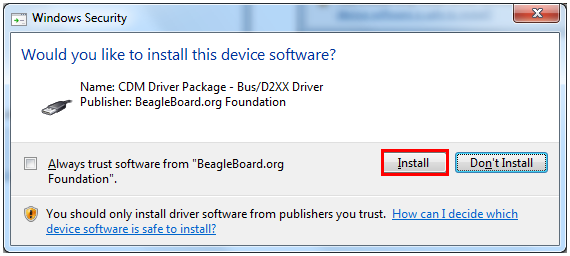
If you press [Install] button, it will start installing the CDM port driver. Once this installation is done, you will have another window as follows. Be careful, do not press [Don't Install]. This is not the same driver you installed before. You need to install this as well.
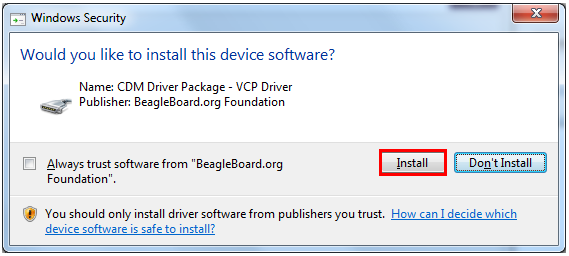
If you press [Install] button, it will start installing the Network Adaptor driver. Once this installation is done, you will have another window as follows. Be careful, do not press [Don't Install]. This is not the same driver you installed before. You need to install this as well.
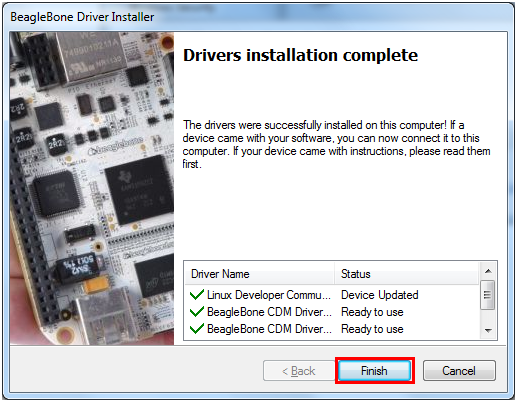
You May or May Not have some additional installation window. I suggest you to insall everything that pops up. Once you install all the drivers, you will get a window as shown below. Then press [Finish] button.
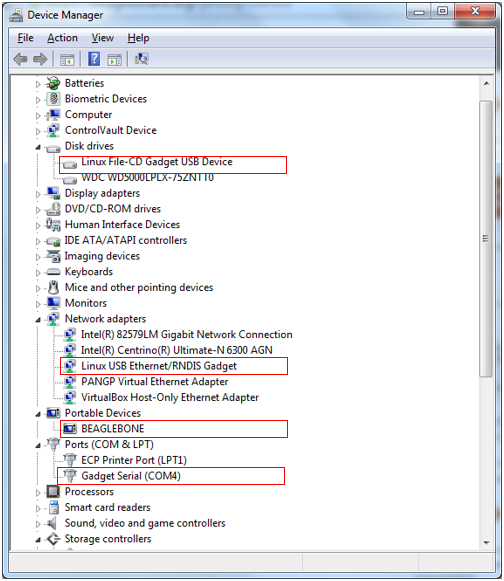
This is the end of driver installation. If everything has been installed properly, you may see new hardwares registered in Device Manager as shown below. It is not required to check this.. but I always recommend you to check the device manager whenever you install any new hardwares or drivers. It would be very helpful for troubleshooting if the installed hardware does not work.
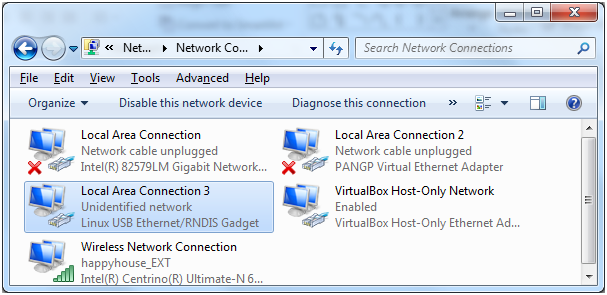
In addition, you would see a new Network Card detected in the network adaptor list. It means that now the USB is working as a ethernet (LAN) connection (In reality, by installing these drivers the single USB port can perform multiple functions at the same time,
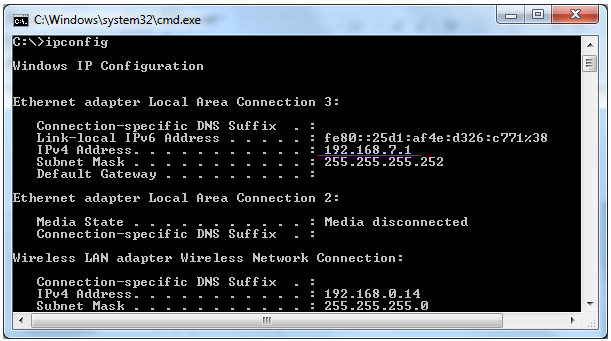
If you run ipconfig in command window, you will find a network adaptor that has the ip address of 192.168.7.1 as shown below.
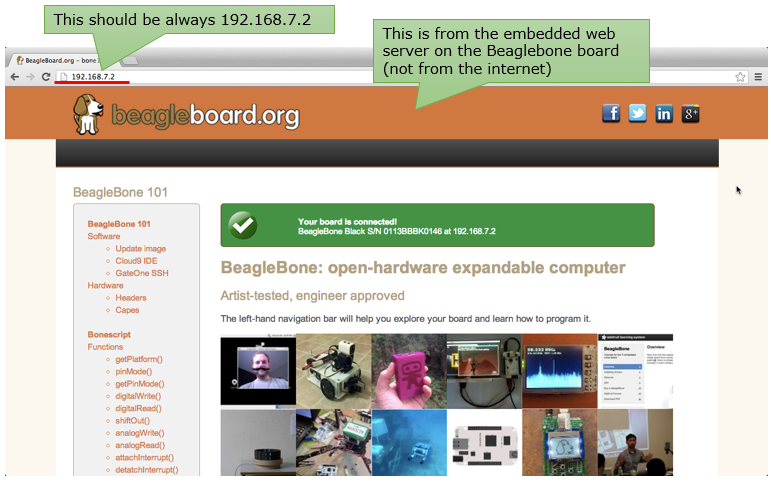
Step 3 : Connect to Beaglebone Embedded Web server
Now launch a browser Google Chrome or FireFox (Not Windows Explorer. Windows Explorer would not work very well for this). And then browse to 192.168.7.2. This IP is not the IP on the internet. This IP is the IP of the Beaglebone board connected to your PC. If you see some contents similar to as shown below, it means the ethernet connection through the USB is working fine and the web server running on Linux on the board is runing OK.
Reference :
[1] Mouser Electronics -- First-Time Setup of the BeagleBone Black [2] Getting Started with the Beagle Bone Black [3] Beaglebone Black MicroSD Boot w/Expanded Linux Filesystem Partition
|
||