|
Linux |
||
|
Kernel Compilation
Linux Kernel Compilation process would vary with the type of distribution (e.g, Ubuntu, Debian, Fedora etc) and the kernel version. So you may not find any single tutorial or tip that would lead you to the completion of the compilation without any problem. So, what I am going to describe in this note would not be the perfect solution for everybody. What I want to do in this note is to share my experience of Kernel compilation and how I handled each of the problem that I came across during the process.
System Environment for Compilation
What I have tried for this note can be summarized as follows. As mentioned below, I used Ubuntu in Virtual Box. I strongly recommend you to try with this kind of virtual environment if you are not an expert on this process so that you can easily recover (reimage) the operating system when you have any serious problem during the process.
I suggest you to set the disk space for the virtual box greater than 40 GB since the kernel compilation process require much larger disk space than you may think. At first, I tried with 20 GB disk space and the compilation process has stoped due to lack of storage space. I tried the compilation right after the Ubuntu installation without doing any update... expecting to get more problems for study purpose.
Followings are all the upgrades that I did while I am troubleshooting the various problems during the compilation process. I don't think these upgrade would solve all the problems that you may come across when you are trying on your own, but can be a useful starting point.
Step 1 : Check on the current kernal version of your Linux.
You can figure it out using uname -r command as shown below.
Step 2 : Download the Kernel Source code.
I have tried two different types of the kernel package which I will call Package 1 and Package 2. Both of the package compiled OK. I got problem with booting with Package 1 but no problem with Package 2. In terms the compilation procedure, there was no difference between them.
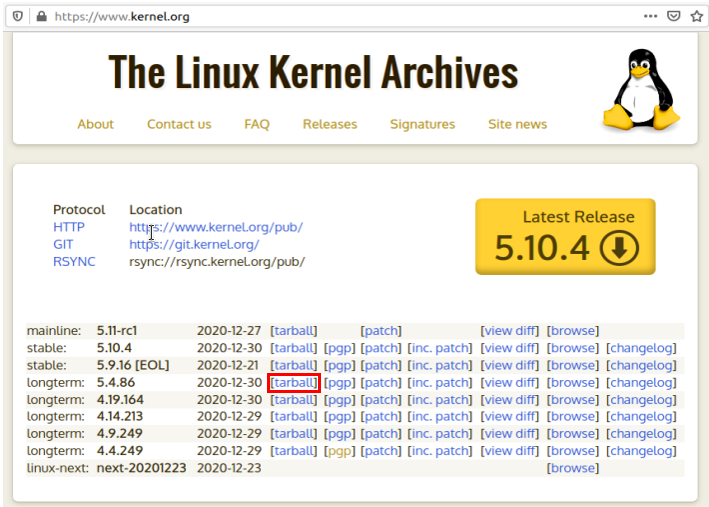
I downloaded a package from www.kernel.org as below. Unfortunately there was no package that exactly matches the kernel of my Ubuntu. So I just picked the version that looks closest to my Ubuntu. I downloaded the one highlighted in red box as below.
You can download it in any directory. In my case, I downloaded in the following directory.
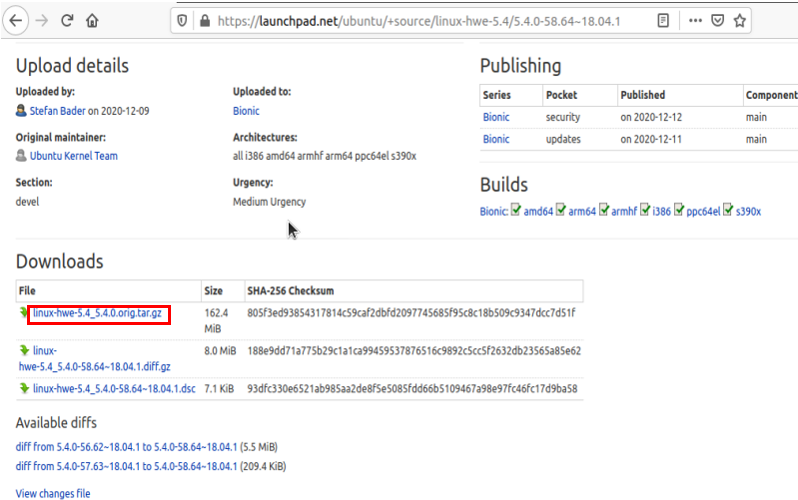
Another package that I tried is the one that I downloaded from here.
Step 3 : Unzip the source code package as shown below.
If you want to try with Package 1, it would be uncompressed it as follows.
You would get the unzipped directory as shown below.
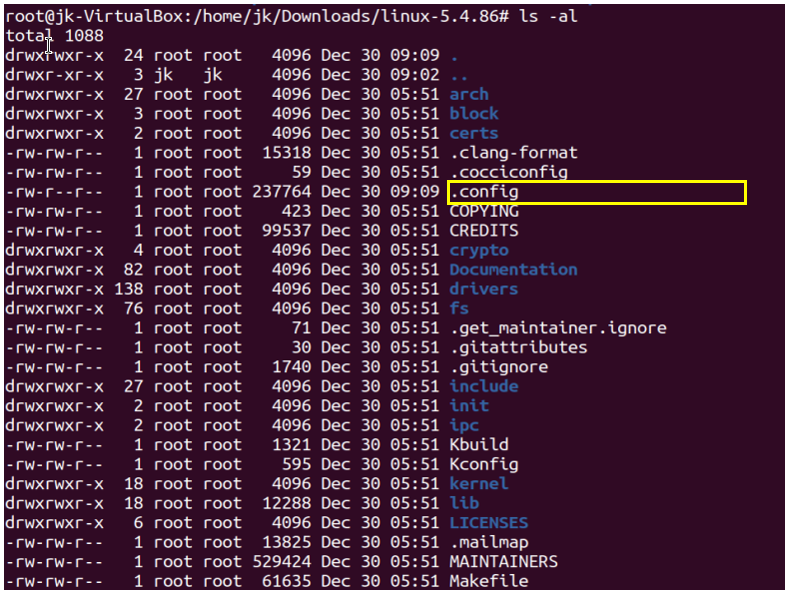
You would find many files and directories in the unzipped directory as shown below.
If you want to try with Package 2, it would be uncompressed it as follows.
Step 4 : Create a config file for compilation.
Now you have to create a config file for the compilation. The easiest way would be just to copy it from the exising config file as shown below.
NOTE : This is a single line command $ cp /boot/config-$(uname -r) .config
You can confirm the .config file is created as shown below.
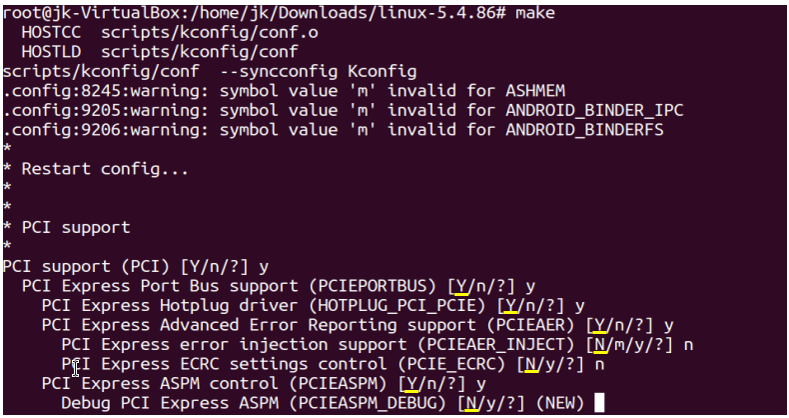
Step 5 : Customize the configuration
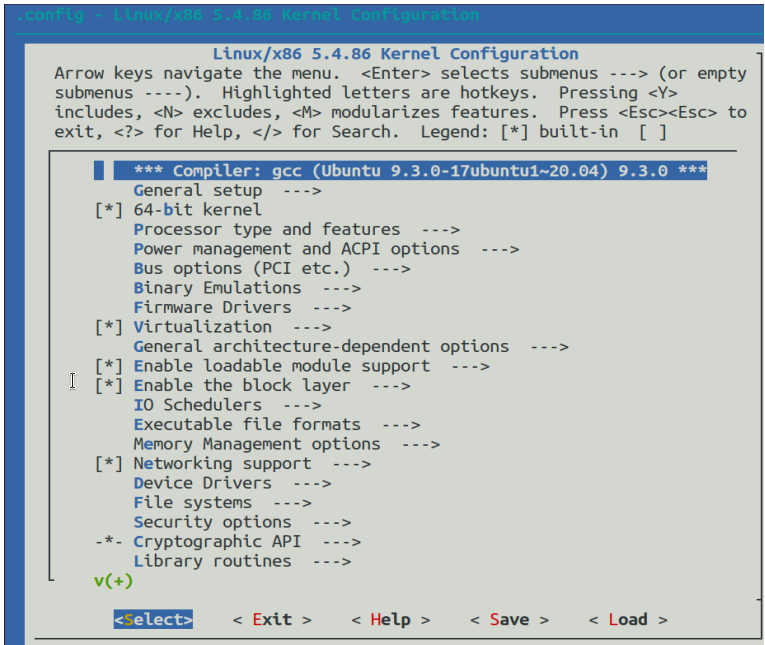
You can customize the configuration using following command [make menuconfig].
If everything goes with no problem, you should get a screen as shown below. (NOTE : In my case, this is the step that I came across the most problems and most of the update listed in [Pre-Requisite update] section were done while troubleshooting this step).
You can change the configuration as you like using this tool, but in this tutorial I haven't changed anything... I used the configuration as it is.
Step 6 : Compile
Now compile the code by 'make' command. You would get several questions at the initial stage. I picked the first option for every questions as shown below. NOTE : This step takes very long time to compile every source code file. In my case, it took almost 3 hours to complete.
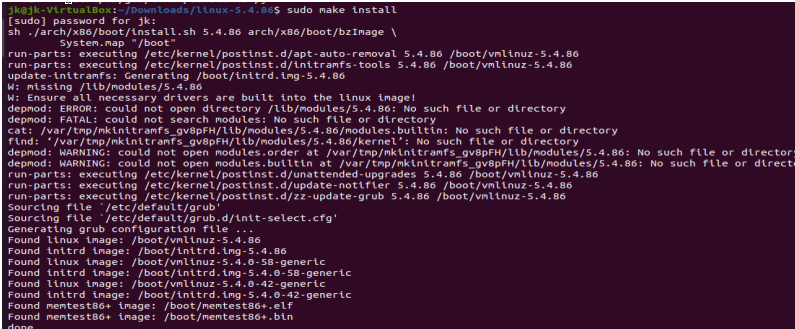
Step 7 : Install the compiled kernel
You can install the compiled kernel as shown below. Run [sudo make install]
Then you would get the result as follows. This is from Package 1, but you would get the similar result from Package 2 as well. (NOTE : I see some errors here (depmod:ERROR, depmod:FATAL), but it doesn't seem that these are the root cause of any problem)
Then you would get the result as follows. This is from Package 1, but you would get the similar result from Package 2 as well.
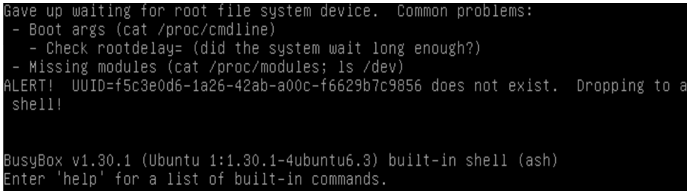
Step 9 : Reboot
Now reboot the system for the new kernel to take effect.
With Package 1, the new kernel does not boot up completely and don't know the root cause of this failure. At least, you see basic kernel commands works and kernel version is changed as expected. This is the next step for troubleshoot).
With Package 2, the kernel boots up without any problem.
Compiling specific module only
This section will explain on how to compile the kernel source for only one specific module. In this example, I used the same setup as described in System Environment for Compilation and assume that all the updates has already been done as described in Pre-requisite update.
Step 1 : Move to the root directory of the source code. In my example, I am in the following directory.
Step 2 : Compile the module source code using the command in the following format.
$ make modules SUBDIRS=directory_path
In my example, I set the directory and got the result of the compilation as shown below. This took only a few minuites.
Step 3 : Install the compiled module using the command in the following format.
$ make modules_install SUBDIRS=directory_path
In my example, I set the directory as shown below.
If you are using the exactly same setup as described in System Environment section and did update as in Pre-requisite Update, you may not see any problems during the compilation. What I am trying to show in this section is some of problems that I had without doing any update before trying compilation. The way that I found the solution to the problem is just copying the error message and googling it. In most case, you may found the solution with just a few pages of tips that Google search come up with.
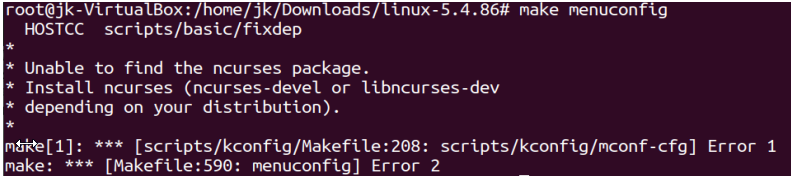
The first problem that I had was following error when I tried [make menuconfig]. For this one, I didn't need to do anything since the direct solution is given with the error message. I just did # sudo apt install make
The second problem is also with [make menuconfig] as shown below. At first, I was thinking of installing gcc only, but after googling I did following. # sudo apt install build-essential
I had another problem with [make menuconfig] was as follows. Following updates solved this problem. # sudo apt-get install libncurses5-dev libncursesw5-dev
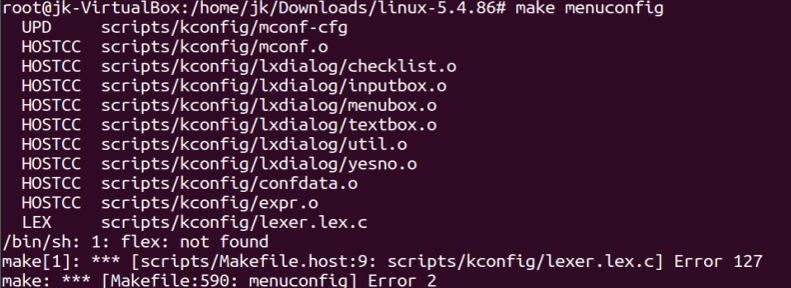
Next problem that I had with [make menuconfig] was as follows. Following updates solved this problem. # sudo apt-get install flex
Next problem that I had with [make menuconfig] was as follows. Following updates solved this problem. # sudo apt-get install bison
I had a problem when I compile the source with [make]. Following updates solved this problem. # sudo apt-get install libssl-dev
Reference :
[1]
|
||