|
Java |
||
|
Java - JDK Setup
There are many JAVA development tools out there and most of them are GUI based IDE (Integrated Development Environment). You may see the introductions to some of those tools here : The top 11 Free IDE for Java Coding, Development & Programming. Among the IDEs, there is one called AndroidStudio on which I have my note. If you are to use Java as a job, you would not have much choice of the tools since you may need to use a specific tools being used in the company. However, if you are using Java for learning a programming language, I would strongly recommend you to use command line based JDK(Jave Development Kit) as shown here. I think relying too much on GUI based IDE would be the best way to spoil a programmer :). I would suggest you to stick to this kind of primitive command line method until you reached a certain level of skills and knowledge on how underlying Java works.
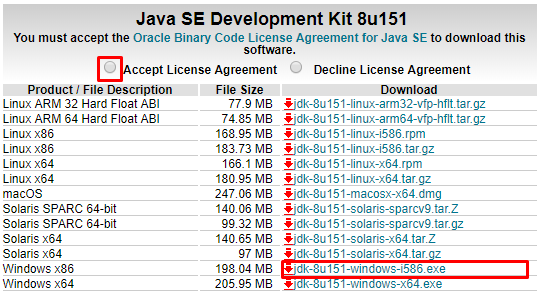
You can get the JDK(Java Development Kit) from following links and I am using the version marked below for this tutorial and operating system I am working on is Windows 10.
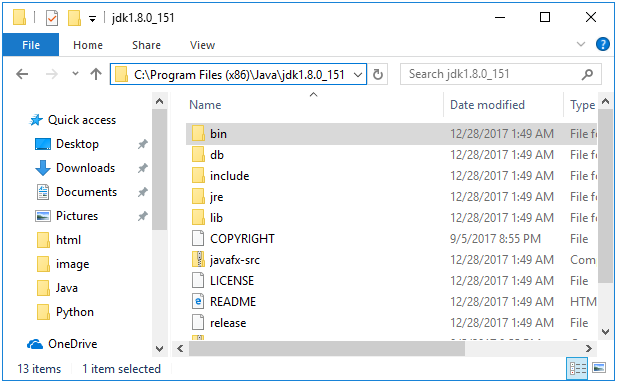
Once you downloaded the installation package, just run it and follow through the instructions on the installation program. I would not explain about the installation process itself since just a couple of mouse click would be enough. One thing I want to suggest you to check is to check / remember the location (folder) of the installation. In my case, the package is installed in the folder as shown below.
This is not the mandatory step. That is, even without this step you can still compile and run Java programs you wrote. However, you always have to type in the full path of Java compiler(javac) and virtual machine every time you compile / run your code. If you complete this process, you can compile and run your code from any folder without typing in the full path (long typing) for the compiler.
I will show you how to add java bin folder where javac.exe and java.exe is located on Windows 10. You may see a little bit different screen if you are using other operating systems, but the overall idea is same. The fundamental ida is to add java bin path to the operating system parameter so that the folder can be recognized from any folder.
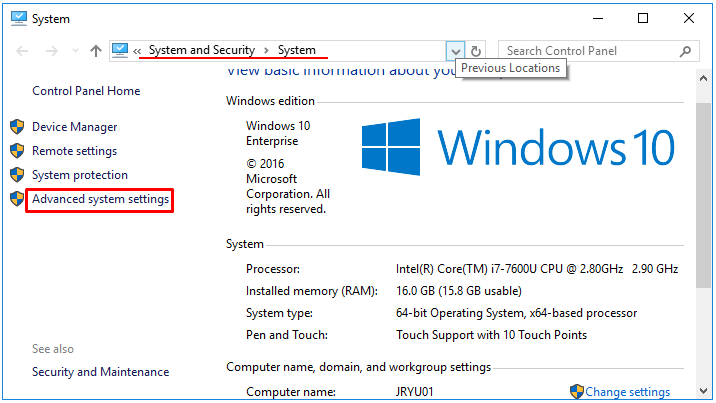
Step 1 : Open up Windows Control Panel and go to [Advanced System Settings]
Step 2 : Click on [Edit environment variables for your account]
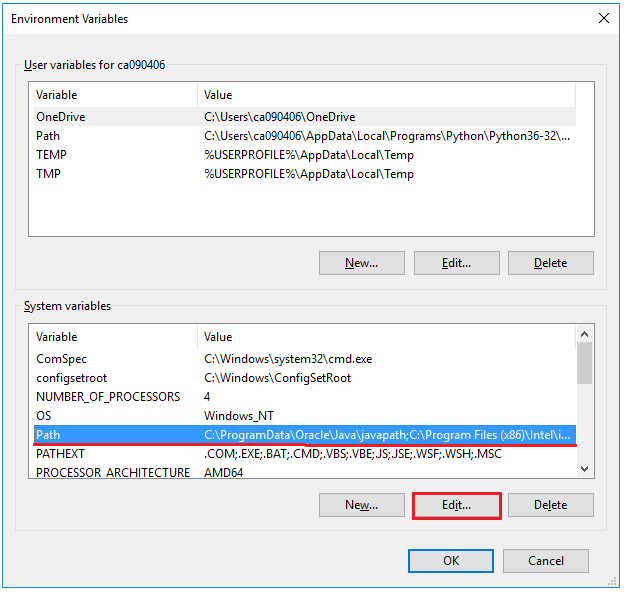
Step 3 : Select the [Advanced] panel and click on [Environment Variables] button as below.
Step 4 : Select [Path] parameter and click on [Edit] button.
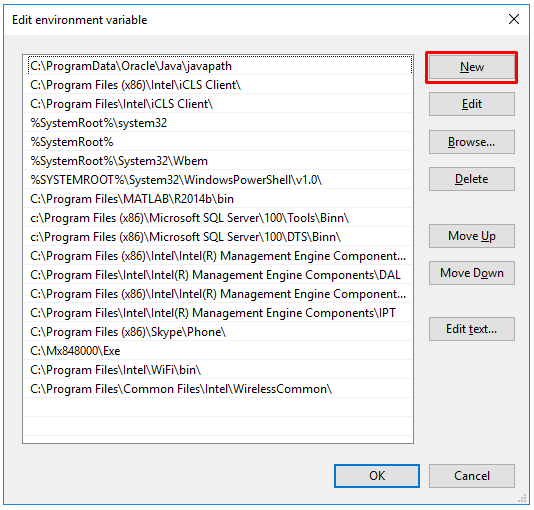
Step 5 : Click on [New] button.
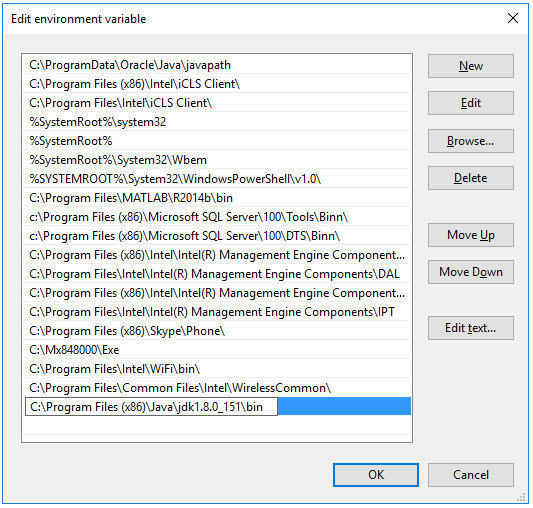
Step 6 : Add the path to the folder where javac.exe and java.exe is located as shown below and then click on [OK].
Step 7 : Check (Verify) that the added path is properly recognized by the operating system as shown below.
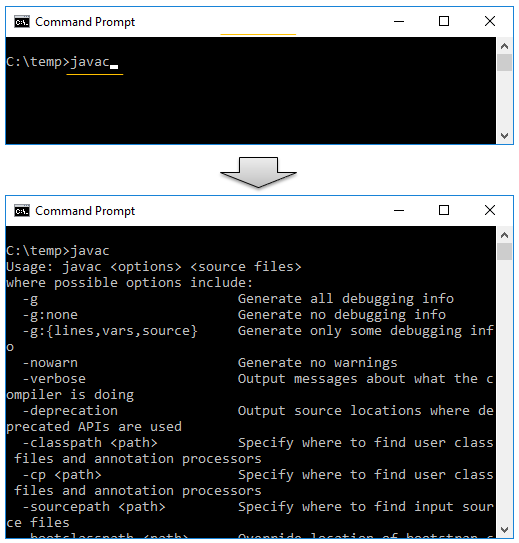
Once you've completed the process, run a new Command Prompt and try followings (run a NEW command prompt AFTER the path setting is important)
NOTE : If you see following message instead of the screen shown above, it implies that Java path addition is not done properly or Java installation might have not been done properly. 'javac' is not recognized as an internal or external command, operable program or batch file.
|
||